'%3e%3cg%3e%3cpath%20d='M99.957992578125,8.09524329421875L91.769892578125,8.09524329421875C91.592492578125,8.09524329421875,91.425792578125,8.17619562421875,91.316492578125,8.31651282421875L80.775292578125,21.840944824218752L75.592592578125,8.46402682421875C75.506592578125,8.24275682421875,75.293292578125,8.09524329421875,75.056692578125,8.09524329421875L66.691192578125,8.09524329421875C66.418792578125,8.09524329421875,66.18409257812499,8.28593082421875,66.12849257812499,8.55217482421875L62.210992578125,27.05424482421875L71.436692578125,27.05424482421875L73.332692578125,18.10094482421875L76.486792578125,26.39044482421875C76.639192578125,26.78984482421875,77.020892578125,27.05424482421875,77.447392578125,27.05424482421875L82.692892578125,27.05424482421875C83.011892578125,27.05424482421875,83.312892578125,26.90674482421875,83.506492578125,26.65314482421875L89.033292578125,19.47174482421875L87.427592578125,27.05424482421875L96.653292578125,27.05424482421875L100.520692578125,8.79143382421875C100.595992578125,8.43164582421875,100.323592578125,8.09344482421875,99.957992578125,8.09344482421875L99.957992578125,8.09524329421875ZM132.531392578125,8.09524346421875L104.728492578125,8.09524346421875C103.837892578125,8.09524346421875,103.067292578125,8.72127482421875,102.882692578125,9.59556482421875L99.457992578125,25.76624482421875C99.318192578125,26.43004482421875,99.821792578125,27.05424482421875,100.497392578125,27.05424482421875L128.54539257812502,27.05424482421875C129.346392578125,27.05424482421875,130.038392578125,26.49124482421875,130.205392578125,25.70504482421875L133.642392578125,9.47143482421875C133.792392578125,8.76085182421875,133.253392578125,8.09344482421875,132.531392578125,8.09344482421875L132.531392578125,8.09524346421875ZM32.010492578124996,12.171644824218749L19.713092578125,12.171644824218749L19.713092578125,12.16984482421875C19.053592578125,12.16984482421875,18.481892578125,12.63397482421875,18.345692578125,13.28339482421875L16.494492578124998,22.04604482421875C16.394122578125,22.52634482421875,16.757892578125002,22.97784482421875,17.247192578125002,22.97784482421875L32.727292578125,22.97784482421875L29.596492578125,27.05424482421875L8.516052578125,27.05424482421875C7.204232578125,27.05424482421875,6.225745578125,25.84184482421875,6.498144978125,24.55374482421875L9.639692578125,9.72148482421875C9.840412578125001,8.77344682421875,10.675532578125,8.09524552421875,11.641472578125,8.09524552421875L35.151992578125004,8.09524552421875L32.010492578124996,12.171644824218749ZM48.001392578125,8.09524552421875L56.614192578125,8.09524552421875C56.897392578125,8.09524552421875,57.141092578125,8.29492782421875,57.200192578125,8.57196482421875L61.114192578125,27.05614482421875L51.560492578125,27.05614482421875L48.730792578125,13.66476482421875L41.562392578125,22.99044482421875L47.415392578125,22.99044482421875L48.275592578125,27.05604482421875L32.985392578125,27.05604482421875L47.313192578125,8.43524582421875C47.478092578125,8.22117182421875,47.732592578125,8.09524552421875,48.001392578125,8.09524552421875ZM147.350392578125,21.48654482421875L157.643392578125,8.09524552421875L163.093392578125,8.09524552421875L148.767392578125,26.71604482421875C148.602392578125,26.93014482421875,148.348392578125,27.05604482421875,148.079392578125,27.05604482421875L139.466392578125,27.05604482421875C139.183392578125,27.05604482421875,138.939392578125,26.85644482421875,138.880392578125,26.57934482421875L134.966392578125,8.09524552421875L144.520392578125,8.09524552421875L147.350392578125,21.48654482421875ZM180.116392578125,22.97784482421875L183.269392578125,8.09524552421875L192.649392578125,8.09524552421875L189.156392578125,24.58434482421875C188.851392578125,26.02534482421875,187.582392578125,27.05604482421875,186.115392578125,27.05604482421875L163.111392578125,27.05604482421875C161.561392578125,27.05604482421875,160.405392578125,25.62234482421875,160.728392578125,24.10044482421875L164.117392578125,8.09524552421875L173.496392578125,8.09524552421875L170.344392578125,22.97784482421875L180.116392578125,22.97784482421875ZM219.894392578125,8.09524552421875L219.035392578125,12.160854824218749L219.041392578125,12.16265482421875L203.668392578125,12.16265482421875L202.953392578125,15.53746482421875L217.322392578125,15.53746482421875L216.464392578125,19.60304482421875L202.091392578125,19.60304482421875L201.376392578125,22.97784482421875L216.727392578125,22.97784482421875L215.865392578125,27.04354482421875L200.512392578125,27.04354482421875L200.512392578125,27.05424482421875L193.134392578125,27.05424482421875C192.102392578125,27.05424482421875,191.333392578125,26.10264482421875,191.548392578125,25.08984482421875L194.761392578125,9.91397482421875C194.985392578125,8.85259982421875,195.917392578125,8.09524552421875,196.998392578125,8.09524552421875L219.894392578125,8.09524552421875ZM121.542392578125,22.32844482421875C121.461392578125,22.70804482421875,121.128392578125,22.97784482421875,120.742392578125,22.97784482421875L109.768392578125,22.97784482421875C109.594392578125,22.97784482421875,109.463392578125,22.81594482421875,109.499392578125,22.64504482421875L111.583392578125,12.801274824218751C111.662392578125,12.427094824218749,111.990392578125,12.160854824218749,112.371392578125,12.160854824218749L123.400392578125,12.160854824218749C123.552392578125,12.160854824218749,123.665392578125,12.30117482421875,123.635392578125,12.45048482421875L121.543392578125,22.32664482421875L121.542392578125,22.32844482421875Z'%20fill-rule='evenodd'%20fill='%23FFFFFF'%20fill-opacity='1'/%3e%3c/g%3e%3cg%3e%3cpath%20d='M34.07855987548828,12.171645361328125L41.02473987548828,12.171645361328125L44.164459875488284,8.095245361328125L37.218319875488284,8.095245361328125L34.07855987548828,12.171645361328125Z'%20fill='%23DA3731'%20fill-opacity='1'/%3e%3c/g%3e%3c/g%3e%3c/svg%3e)

Have you ever wanted to catch wildlife in action or boost security on your property? Setting up a trail camera is easier than you might think. In this guide, you’ll learn how to set up a trail camera from start to finish. We’ll also cover trail camera settings that help you get the best shots. Let’s dive in!
What You Need Before Setting Up a Trail Camera?
Before you head into the woods or mount a camera on a tree, gather your gear and get ready for trail cam settings. Good prep makes a smooth trail camera setup. With these items in hand, you’re ready to learn how to set up a trail camera step by step.
- First, pick the right trail camera for your needs. Some models work off grid on batteries. Others plug into a power source or use solar panels. Choose one that matches your mission and budget.
- Next, get sturdy batteries or a power pack. Trail cams usually run on AA or rechargeable cells. Make sure you have fresh cells or a full charge on your backup pack. If you plan long stays, solar or external power is a smart move.
- You’ll need a secure mount or strap. Most cameras come with straps, but you can also use mounting plates or security boxes. A lock or cable helps prevent theft if you leave your camera in the wild.
- Get a large SD card or enable cloud upload if your camera supports it. Cards from 32GB to 128GB work well. Fast cards help when you record video. Label cards so you know which one has new footage.
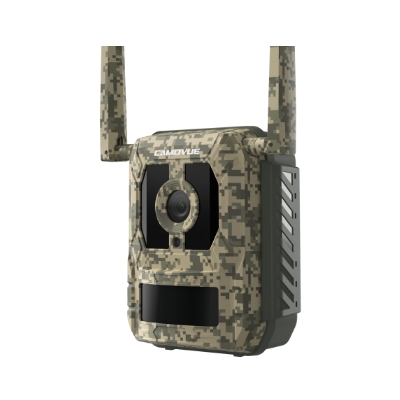
4K 4G LTE Game and Trail Camera with Live View & Starlight Night Vision
4G LTE Live View, Starlight Night Vision in 4K UHD, Smart Detection & Species Recognition, Excellent Snapshot Performance.
How to Set Up a Trail Camera?
Getting your camera in place takes a few clear steps. Read the simple steps below, then follow each step to start capturing images in no time. Here is how to set up a trail camera for beginners:
Step 1: Pick the Perfect Location
First, find the right spot for your trail cam. Look where wildlife passes often, like game trails, watering holes, or feeding areas. If you want security images, place the camera by driveways, sheds, or gates. Make sure the camera sits 3 to 4 feet off the ground to frame most animals or people in the shot. Clear any tall grass or branches that could block the view.
Step 2: Mount Your Camera Securely
Once you’ve chosen a spot, attach your camera. Use the built-in strap, a mounting bracket, or a security box. Wrap the strap tightly around a sturdy tree trunk or post. If you use a bracket, screw it into a solid surface like wood. The camera should sit level. Test its tilt to cover the ground in front. Lock it with a cable or padlock if you worry about theft.
Step 3: Power Up and Insert Memory
Now it’s time to power up. Open the battery cover and pop in fresh batteries or plug in an external pack. Next, slide in your SD card. Make sure the card clicks into place. Close all covers and seals to keep rain out. Turn on the camera. You’ll see a brief startup screen that checks your power and memory.
Step 4: Adjust Trail Camera Settings
After powering on, head to the menu. Set the date and time so footage is timestamped correctly. Choose your image mode (photo, video, or combo). For photos, pick high or standard resolution. In video mode, select clip length in seconds. This is a key trail camera setting you’ll change based on your needs. Set the trigger interval to avoid too many shots back to back. Finally, choose night-vision settings if you want infrared images in the dark.
Step 5: Test Your Setup
Before leaving, test the camera. Walk in front of the lens to trigger a shot. Review the image or video. Check the angle, focus, and exposure. If the view is too high or low, re-mount the camera and test again. When you’re happy with the framing, close the case and lock it. Now your camera is ready to work on its own.
How to Set Up a Trail Camera for Security?
If you use a trail cam for security, a few extra steps can help keep footage safe:
- Hide Your Camera: Paint it in brown or green to blend with trees and tuck it behind branches or foliage.
- Use a Lock Box: A metal box shields the camera, and a padlock keeps thieves at bay.
- Enable PIN Code: Some cameras let you lock the menu with a PIN. That keeps settings safe if someone tries to tamper.
- Set Alerts: If your cam has cellular or Wi-Fi, turn on push alerts. You’ll get notified when motion triggers the camera.
- Backup Footage: Use cloud upload or swap cards often. That way, you don’t lose video if the camera is stolen.
5 Best Trail Camera Settings and Tips
Getting the right trail camera settings tips can turn good footage into great footage. Read the intro below, then tweak each tip. Your camera menu has lots of options. Five settings stand out for beginners. Master these and you’ll get clear day and night shots without missing action.
1. Video Mode
Video lets you catch animals in motion or record intruders. Set your clip length to 10–20 seconds. Too short, and you might miss key moves. Too long and you waste memory. Pick a mid-range so you get full action without using all your card space.
2. Snapshot
Snapshot mode fires off quick photos. Use this if you want a burst of images when the sensor trips. Many cameras let you choose 1 to 3 shots per trigger. Three shots give you a mini sequence. One shot saves battery and memory. Decide based on your goal.
3. Trigger Speed
Trigger speed is how fast your camera snaps after it senses motion. A fast trigger (0.2 to 0.5 seconds) catches quick animals like deer. A slower speed (1 second or more) might miss fast critters. Check your camera’s specs. Slower cams still work if you aim at walking paths where animals pass slowly.
4. Detection Range
Detection range tells you how far out the sensor looks. You’ll see options like 30, 50, or 80 feet. Longer range works for open fields. Short range reduces false triggers in dense brush. Try different values on test shots. Pick one that suits your site.
5. SD Card/Cloud Management
Memory management is key. Use a class 10 or better SD card for fast write speeds. Choose a large card (64 GB+) if you record video often. If your camera supports cloud storage, link it to your home Wi-Fi or cellular plan. That way, footage uploads automatically. You don’t have to visit the camera to grab cards.
Common Mistakes When Setting Up a Cellular Trail Camera
Even with a good camera, errors can cost you shots. Watch out for these common traps:
- Wrong Angle: Pointing too high or too low can miss subjects.
- Weak Signal: Placing a cellular cam in a dead zone means no upload. Test signal strength first.
- Poor Power Planning: Empty batteries or a drained solar panel leave you blind.
- Incorrect Date/Time: Footage without proper timestamps can confuse you later.
- Overcrowded Framing: Busy backgrounds cause false triggers from moving leaves.
- Skipping Test Shot: Failing to walk-test leads to bad framing or triggers.
Fix these before you leave the camera in the field or on site.
FAQs
How to set up a trail camera for the first time?
To set up your first trail camera, start with fresh batteries and an empty SD card. Mount the camera at chest height on a sturdy tree or post. Power on the camera, set the date and time, then choose photo or video mode. Walk in front of the lens to test the trigger. Adjust until the view and sensor work right, then lock it in place.
How do trail cameras connect to your phone?
Many trail cams use cellular networks to send alerts and images. You’ll need a SIM card or a built-in data plan. In settings, link your camera to its mobile app. When the camera triggers, it sends photos or video clips over the air. You’ll see them in the app on your phone within minutes.
Do trail cameras record all the time?
No, trail cameras only record when the motion sensor trips. This saves battery and memory. In photo mode, the cam snaps images. In video mode, it shoots short clips. Only active sensors trigger recording. You can’t record continuously like a security DVR.
Conclusion
You now know how to set up a trail camera from start to finish. We covered what you need, each setup step, security tweaks, top trail camera settings and tips, and common mistakes. Trail cameras are great tools for wildlife watching and home security.
Try these steps on your next adventure. If you have thoughts or extra tips, share them below. We’d love to hear how your trail camera setup goes!


